
Thirty Minute Thirty Dollar Raised Bed
If you have the space for it, growing a garden is a great idea. Gardening is a productive and fun hobby, but it does have certain requirements. Before you buy any seeds or plants, you have to make sure that the soil is of good quality. The soil then needs to be turned and tilled, all while making sure that no rot or impurities seep in from the rest of the garden.
To make things a little easier, many gardeners consider using raised beds to start their growing projects. This might seem like an added burden, but you can actually make a functional raised garden bed within 30 minutes, with an average cost of about $30. Of course, the actual time and money spent on the bed will vary according to several factors. The discussion below should clear things up about raised garden beds and how to make them:
A Standard Size
The size of a raised bed will depend upon your goals for it. It may have to be larger if your planned crops need to spread out a bit. However, the most common size for raised garden beds is around 4 by 8 feet. Here are some reasons why this is a good size to start with:
- This provides a decent square footage of 32 feet, which is enough for a productive garden
- You can place it in corners and small spaces
- It’s still a manageable space that allows for a quick check and watering session when required
Advantages of a Raised Garden Bed
We’ve already touched upon some of the reasons why you might want to go for a raised garden bed. Here are some more advantages to consider:
- Raised beds can help you take advantage of areas where the garden soil is not rich enough for healthy plant growth
- The beds also help in getting the garden started without having to put in time and effort to enrich the soil
- Raised beds won’t require as much weeding as a regular garden will, probably because weeds won’t be able to spread in from other areas
- The raised beds are also good for a clever lending experience; you don’t have to wade in the soil and won’t be tracking it indoors either (however, this depends on whether there are finished walkways around the beds or not)
- The beds will also make it easier to keep pests and other critters at bay. If necessary, we can also improve masonry ladders for plant protection)
- With raised beds, the plants will have to send their roots down further in search of water. This usually results in healthier and stronger plants.
- Since raised soil warms up more rapidly than soil in the ground, you may expect a longer growing season for your plants
- Raised beds are also better at drainage, which reduces the chances of rot or other water-related damage
What We Need to Make a Raised Garden Bed
Here are the most necessary materials we need to start making a raised bed:
- Wood/lumber: You can buy wood that’s pre-cut to your required size, or make do with longer boards that you already have. It may be cheaper to cut long boards of varying sizes and make them suitable for making your raised beds. The amount of wood you need will depend on how many beds you want to make.
- Exterior screws: We recommend exterior screws due to their rust-resistant properties. They shouldn’t be too expensive; if you like DIY projects, there might be some in your toolbox already
- A cordless or corded drill: this is necessary for drilling holes in order to put together the wooden planks. Corded drills usually have more power, so go for this option if you have it.
- Rebar: around 12 pieces, with lengths according to the size of the bed you want
- Rubber mallet: for hammering in the rebars
- Cardboard or newspaper: this will provide a good base for your raised bed
- The right kind of soil: Since you’d be putting the soil inside the bed, get the best quality possible. Ideally, it should be rich and dark and full of useful microorganisms. The beds should have a mixture of topsoil (50 to 60 percent) and well-aged compost (40 to 50 percent). Make sure to test the soil for its nutrient content and pH level before each growing season. Finally, dress the raised beds with another half-inch compost layer in the middle of the growing season. This will enhance the organic matter and give a boost to your soil’s health.
- Seeds, seedlings, or plants: it doesn’t matter what you start your raised bed with. However, starter plants will get you a harvest sooner than if you begin with simple seeds
If you don’t want to build your raised beds from scratch or are in a hurry, there are also kits available to make things easier. These usually contain all the pieces you need for a raised bed, cut to just the right measurements and with pre-drilled holes to boot. You can choose the kits according to their sizes and the material they use. There’s also the option of buying ready-made beds or paying someone to make one according to your specific requirements.
The Process of Making a Raised Garden Bed
The exact process of making a raised bed will depend on how high you’re making it along with a few other factors. However, the basic method should go something like this:
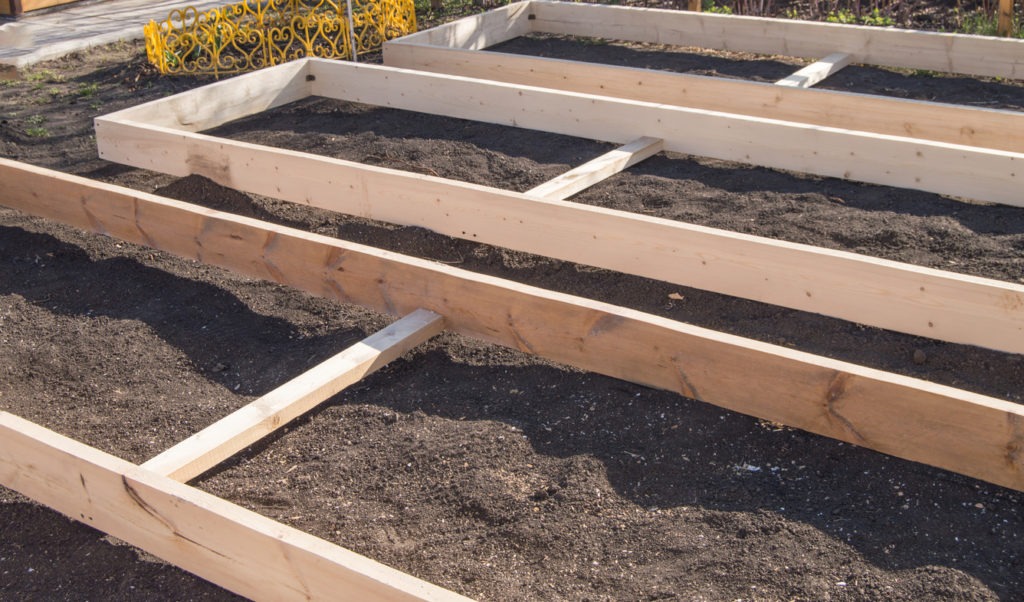
- Cut your wooden boards into four pieces; if the bed is rectangular, you want two short equal pieces and two longer equal pieces
- Drill a hole at each corner of the shorter pieces
- Stand one of the longer boards on its side and use the rubber mallet to hammer two rebar pieces at each corner. This should go into the ground a few inches.
- Prop the smaller boards up and use one rebar at each center to support them temporarily.
- Prop up the other longer board and align the frame as you want it. Hammer rebars in the same way on the second longer side.
- Reinforce the box frame better by hammering rebar pieces around 12 inches from each short side corner. Take the temporary supports away, and put a couple of rebar pieces at two-foot intersections along the longer sides. Hammer the rebar until only 6-10 inches remain above the ground
- Line the raised bed with cardboard or newspaper. Make it thoroughly damp, and then put it in the soil. Leave the top few inches of the box above the soil; don’t fill it all the way up. Make sure that the base completely covers the ground, or else weeds might come up through the soil below.
Alternative Materials for Making Raised Garden Beds
Not everyone has all the usual materials on hand for making a raised garden bed. If you find yourself short, it may not be necessary to rush out to your local garden center right away. Here are some alternative materials that you might be able to use for your garden bed:
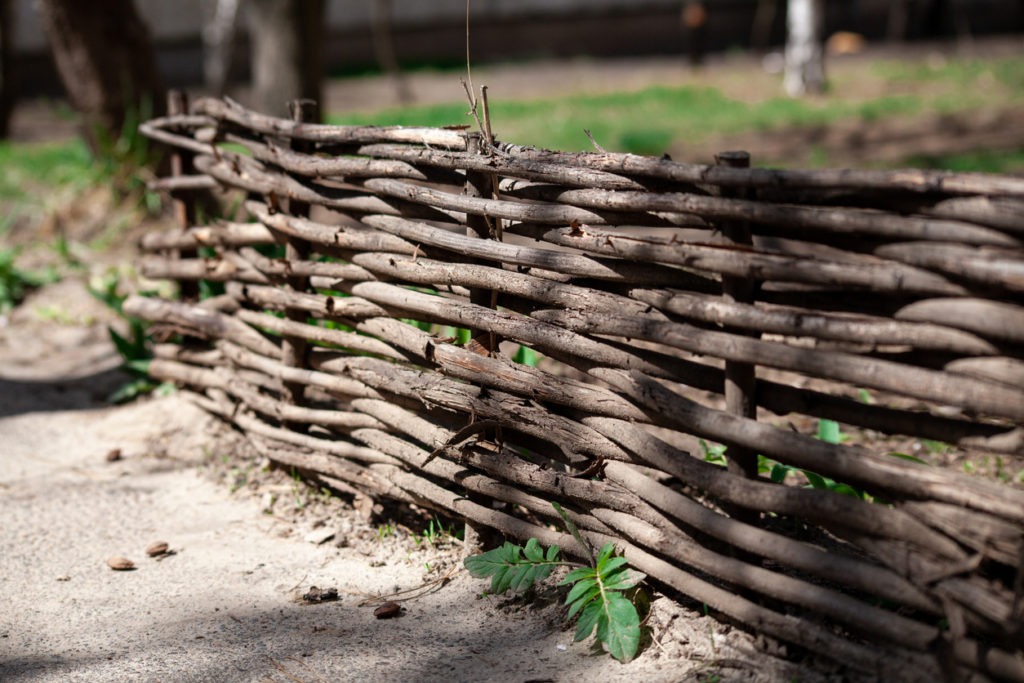
- Wattle: if you can weave a wattle frame, collect some long and flexible sticks and get started. Read up on tips for gardening with young children and get them involved in collecting the sticks too
- Tree logs: If you have cleared a tree recently, or a neighbor has done so, you may use the logs as an alternative and cost-effective option. Cut the pieces that are around a foot or more in diameter and as straight as possible.
- Concrete blocks: Put the blocks with the open ends on top. Put decorative flowers or herbs in the space inside.
More Tips for Having Raised Garden Beds

If you’re convinced that raised beds are the best choice for your garden, the following tips should make the process even easier:
- Consider a waist-high bed: if you’re looking for the best garden tools for gardeners with back problems, consider a raised bed that’s around waist-high. This can help out aspiring gardeners who have physical limitations
- Build the beds in a space that gets as much sunlight as possible. Five or six hours are ideal, but you may have to provide a bit of shade if the sun is too harsh.
- The beds should be at least a foot in width but not more than 4 feet long in order to ensure that weeding plus harvesting remain manageable
- The orientation of the beds should be north to south; this will prevent any plants from shading others out
- The ideal bed height will be around 10-14 inches; this will help to make the roots strong
- If you have more than one raised bed, leave a space of 2-3 feet in between them; this is necessary for walking around to manage the garden and allow wheelbarrow access
- If the bed is low on the ground, you will have to install a fence for keeping out pesky creatures like rabbits, deer, or woodchucks
- With a rebar and plank design instead of one with screws, you can replace an individual plank without removing the rest as well.
- Go for woods that are resistant to rot; examples include redwood, cedar, and oak
- If you want to start sowing your plants during the summer, go for fall crops such as carrots, lettuce, kale, broccoli, etc. You can also ask your local garden center for the best plants and flowers to try out at this time
- If you prefer to wait until the spring to start growing in your raised beds, cover up the soil with shredded leaves and grass clipping during the fall. This will help you get a good compost layer before spring starts
- The good drainage of raised garden beds also means that they dry out quite often. Keep an eye out for this occurrence and make a watering schedule accordingly. For most plants, it’s good to give them a long watering session at the start of the evening. Check again during the afternoon, especially if it’s a scorching summer. If things get too tough, you may want to consider investing in a drip-irrigation system and timer to save hassle and gardening losses
Conclusion
The benefits of raised garden beds are quite attractive, so why not try them as soon as possible? If you’re having trouble with poor soil, pests, or weeds, a raised bed might be the answer to most of your gardening woes. The investment is low and the project probably won't take much time either, so think about making that bed to enhance your crops this season.