One of the best things about camping is cooking and preparing food with the beautiful nature surrounding you. It can help you feel “one with nature.”
But of course, one of its common and expected challenges is the cleanup after eating. Have you heard of “leaving no trace”? Whether you’re living it up in a rustic cabin or roughing it out in the backcountry, you just have to make sure not to pollute the camping grounds while preparing and cooking your food. You still need to wash and clean the dishes, utensils, and some appliances you used.
Of course, you are not taking the entire kitchen with you while camping or traveling. With more people engaging in outdoor activities, kitchen appliance manufacturers have come up with products that suit their lifestyles. More and more portable versions of kitchen appliances are popping up in the market.
Many campers are health-conscious, so they may want to bring their healthy habit even when they are away from home. For those making healthy and freshly-made shakes, smoothies, or fruit and vegetable juices every day, it can be challenging to maintain their diet when camping or staying out of town for a few days.
However, they cannot take their countertop blenders as they are too bulky. They take up a lot of space, and it’s ridiculous if you’re trying to scrunch them inside your camping backpack. Besides, these blenders require a main electrical outlet to get them running; obviously, you cannot find one, especially when camping in the back of the woods.
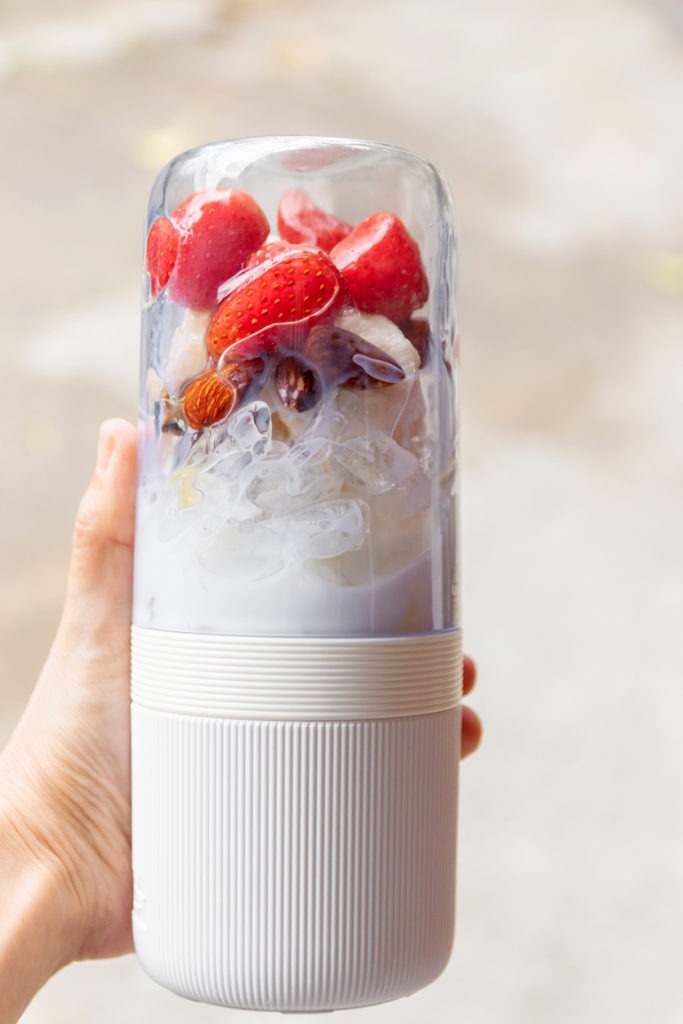
And this is where manufacturers come up with outdoor blenders. They are wireless blenders that are perfect for camping and tailgating. The latest portable blenders are typically rechargeable via a USB port.
Benefits of Using a Portable Blender
Thanks to its compact and convenient size, you can use a portable blender anywhere. Most even have handles or straps for easy carrying. It’s also lightweight, making it easy for you to enjoy healthy smoothies anywhere you go.
These outdoor blenders are perfectly ideal for whipping up shakes, smoothies, and juices on the go. Plus, they serve as tumblers – blend and then drink straight from the blender! And a delightful surprise – some come with blades capable of crushing ice, mashing harder and more fibrous produce, and mixing cocktails. You can also look at the blender settings and speed to achieve the desired texture and consistency of whatever you’re blending.
These kinds of blenders are also user-friendly. Because it’s usually for one serving only, the controls are straightforward. Any newbie to blending would be comfortable using portable blenders.
One great way to get in your favorite smoothie while you’re active is to bring it in your gym bag. Just put it in your gym bag so you can easily prepare your post-workout protein shake right there in the locker room.
Portable blenders are also great to use in the office for a morning pick-me-up. If you don’t have the time to eat breakfast before going to work, you can simply pack the ingredients with your portable blender and prepare them in the office. You can even charge it on your laptop in case you forget to charge it at home.
For those who like to go to the beach, camps, and hikes, you can be able to mix a smoothie while lounging on the shoreline if you bring a portable blender with you.
A portable blender can be a great companion if you love to travel. This way, you can take your favorite smoothies no matter where you go – whether in another country or out of state. Bring this on your checked bags because airport security won’t accept blades to be brought in your carry-on.
How to Clean Your Blender Outdoors
We use blenders for different purposes. For many people, it’s commonly used for making smoothies or frozen drinks, but it can also be used for mixing pancake batter or homemade soups. Whatever purpose you use it for – all blenders come with one downside: cleaning. It’s one of the trickiest things to clean in the kitchen.
It even gets trickier when you use it outdoors, where there is no dishwasher, sink, or access to tap water. When you’re camping, you would have to resort to quick cleaning. Here’s how you can clean your blender when you’re outdoors:
1. Rinse your blender.
As much as possible, rinse the blender immediately so that the gunk won’t harden, thus becoming harder to remove.
2. Pour water into the blender.
Fill up your blender container about halfway with water. If you have access to hot water, use it.
3. Add dish soap.
Add a drop of dish soap to the water. Don’t add more than one drop, or else it will become too soapy.
4. Turn on the blender.
Close the cap, and turn the blender on. Let the water and dish soap mix together for about 10 seconds.
5. Dump it out.
Dump out the water and soap mixture.
6. Rinse.
Fill the blender halfway with water again, then turn it on to rinse. Dump out the water, then rinse again until it’s thoroughly rinsed.
This simple method will leave you with a fresh and clean blender that’s ready for another smoothie anytime you need it. With a simple rinse of water and dish soap, you can easily clean it when you’re on the go. If you’re conserving water at the camp, at least just rinse it out after every use.
How to Deep-Clean Blender
Once you can, you must deeply clean your portable blender. Here’s how you can do it:
1. Take the blender apart
Remove the assembly of the cup from the blender base. Take off the lid and unscrew the base while being careful around the sharp blade. Remove the gasket seal, and if the blade is detachable, remove it as well.h
2. Wash the jar or cup
Clean the cup with warm and soapy water and a sponge. The blade is not usually installed at the cup for portable blenders, making it easier to clean. Rinse it thoroughly, then dry it carefully.
It can also be washed in the dishwasher, but hand washing is faster, and it eliminates the risk of etching the plastic or glass. The base with the USB slot for charging is not dishwasher safe, so make sure don’t put it in the dishwasher.
3. Wash the other small pieces
Hand washes the gasket seal and the jar base (and the blade if it’s detachable). Soak the pieces in a bowl with warm, soapy water and take care around the sharp edges of the blade. Rinse these parts thoroughly and dry them.
4. Use the blender itself to remove stuck-on items
If your blender has sat for a while after being used, it may have dried, stuck-on food and stains that you have to deal with. To make it easier to remove, mix equal parts of baking soda and water, and run it through the assembled blender with the lid sealed. Dump the solution and take apart the removable parts of the blender. Follow step #3 to wash the pieces.
5. Clean the blender base
The blender base with the motor must never be submerged in water or put inside the dishwasher. Unplug it before cleaning, and wipe it down with a clean, damp cloth. Remember also to wipe down the cord periodically and check it for damages.
6. Reassemble and store
Once all the components are dry, reassemble the blender and store it. If you use it often, place it on your countertop or in an easily accessible location. But if your blender is seldom used, store it inside your cupboard or cabinet, or drawers to keep it from gathering dust.
Tips for Keeping Blenders Clean
- Check your owner’s manual for any special cleaning recommendations. It’s always best to follow their instructions for cleaning.
- Always make sure that your blender is properly assembled before every use. If the lid or some part is not screwed on the right way, or if some pieces are not assembled, then the blender’s contents may splatter once you turn it on, especially at high power.
- Know what your blender can and cannot do. Make sure you’re using it for its intended purposes and that you’re not adding ingredients or items that can cause things to get stuck in the hard-to-clean areas of your blender. Also, using the blender only for its intended purposes will keep it working properly.
- Quickly clean up any spills on the base of the blender using a damp rag.
- Even if a blender is dishwasher-safe, handwashing is a better cleaning option. Plastic and glass blenders can be etched and scratched by washing them in the dishwasher. Handwashing will also be quicker and safer.
- Do not store items in the blender, especially if you use a strong-smelling ingredient. As much as possible, serve the freshly blended finished product immediately so you can enjoy them fresh. But if it’s not possible, transfer the contents to a glass or a cup to make the blender easier to clean.
- Sometimes, soap and water aren’t enough to remove the stubborn stains or stuck-on food from the container. You may use lemon as a natural cleanser. Put a quarter of a lemon into the container (put more if you’re cleaning a full-sized blender). Fill the container halfway with water, close the lid, then blend for about one minute. Rinse the container with clean water. You can also use equal parts of vinegar and water to get rid of stubborn stains and odors.
- If your blender is smelly, blend equal parts water and baking soda. Let it sit in the blender for about 10 minutes before washing it as usual.
- Most blender lids come apart in two pieces. Check your owner’s manual to see if your blender’s lid does. Take them apart and clean them separately to remove any stuck-on food particles in the crevices.
Also, if you can’t decide about what type of blender to get, our Guide to Choosing the Right Blender for Your Needs might help you.

