Every devoted coffee drinker knows that freshly roasted beans are by far the most flavorful. And what could be fresher than roasting your own coffee? Although it may seem difficult, the process is simpler than you might think. With home roasting, you may experiment with different coffee origins, drink freshly roasted coffee anytime you want, and more. And while the learning curve could seem intimidating at first, it will all be worth it when you know that you roasted and brewed your morning coffee.
Roasting Coffee at Home
The ability to personally roast your coffee is unmatched in terms of control. It allows you to have access anytime to your coffee cravings in whatever brew or flavor. However, there are other benefits to roasting at home besides it being flexible. A key consideration is freshness; some types of green beans can be kept in storage for up to a year without becoming bad. Roasted beans, however, begin to lose their flavors and aromas after only a few weeks. To keep your coffee fresh, purchase green beans and roast a small quantity every week or even every day. Additionally, green beans are considerably less expensive than roasted ones. Once you’ve mastered your technique and have all the necessary tools, you might find that you end up making significant financial savings over time.
You can also increase your knowledge of coffee by roasting it yourself. As time goes on, you’ll learn what makes your favorite coffee taste so good and how to accentuate it by changing your roast profile or selecting other beans. Your palate will develop with time and experience, enabling you to enjoy your coffee even more.
Home Coffee Roasting Essential Knowledge
There are some things you should know about coffee before you begin your home roasting adventure. These five facts will provide you more insight into what you’re about to undertake.
-
Ventilation
Any space where you are roasting needs to be ventilated. Use the oven fan if there is one, or leave a window open. During the roasting process, there will be some smoke, and preparing ventilation in advance makes dealing with it easy.
-
Roast Level
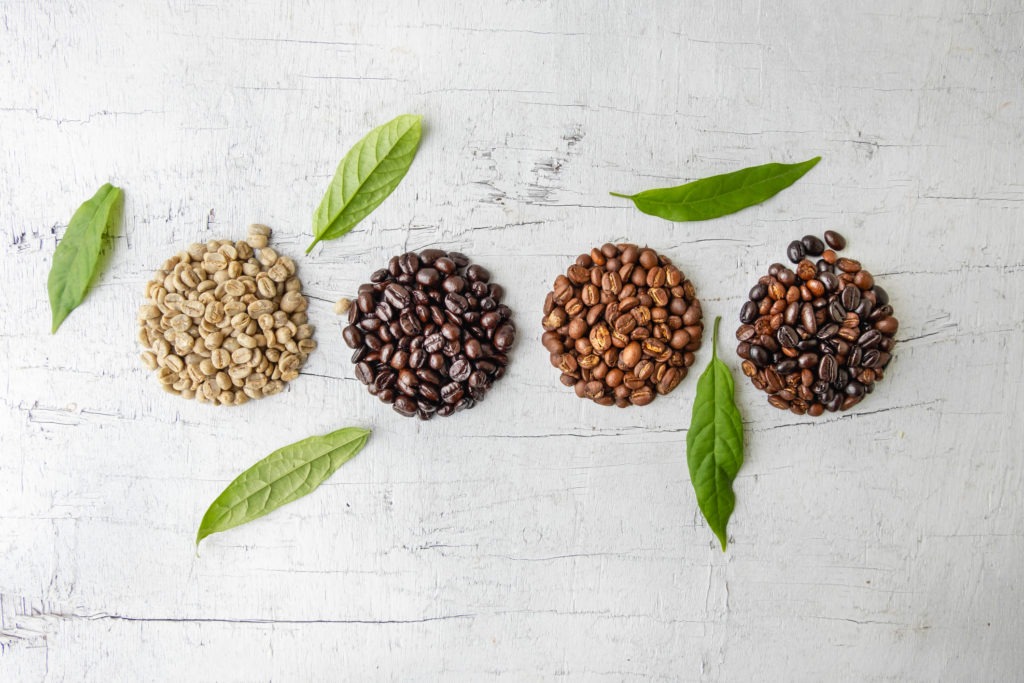
While the beans are being roasted, take note of the color changes and cracks that appear in them (we’ll talk more about the roasting stages below). They’ll start out green, then turn yellow, light brown, golden brown, and finally dark brown. The cracks the beans make will also be audible and seen. The first crack occurs when they transition from light brown to golden brown. If you want a light roast, remove them from the heat at this point; if you want a medium roast, wait an additional minute.
If not, let them cook until they are golden brown and dark brown, at which point they will crack a second time. It will be a medium-dark to dark roast at this point. If you leave the beans on for too long, they will develop a strong smoky flavor and taste like charcoal. Be sure to remove them as soon as the second crack occurs. Nobody wants charred beans!
When deciding when to remove the beans from the heat source, keep in mind that they will continue to cook as they cool after you remove them from the heat source or while it is off.
-
Chaff
The byproduct of roasting coffee is known as chaff – the dry husk of the coffee bean. This part can be messy. You may take your beans outside or over the sink to chill them in the colander or bowl to avoid a mess. Simply give the beans in your colander a little more of a shake if you are having trouble getting the chaff out. Most of it will fall off on its own when there is a lot of movement.
-
Storage
When the beans have cooled, keep them out of heat and light in an airtight container. Your beans will stay fresh for up to a month if stored in this manner. Keep in mind though that they will be at their freshest in the first two weeks after roasting, so don’t wait too long!
-
De-gassing
It’s important to understand de-gassing if you roast beans at home on your own. It is safer and will yield better flavors to let your beans de-gas. This is the purpose of the one-way vent on coffee bags, which lets carbon dioxide out while keeping oxygen out.
Let’s start by defining de-gassing. Gases develop inside the coffee beans during the roasting process. Following roasting, the gases, mainly carbon dioxide, begin to leak out. Within the first 24 hours, a significant portion of the carbon dioxide will have exited the beans.
What degassing technique works the best? Simply put your beans in the container you intend to use for storage, but leave the lid off or slightly ajar so that the gases can escape. De-gassing is a must following roasting for a minimum of a few hours and maximum of 24 hours. After that, you should seal the container to keep oxygen out and preserve the freshness and flavor of the beans.
Coffee Beans During Roasting
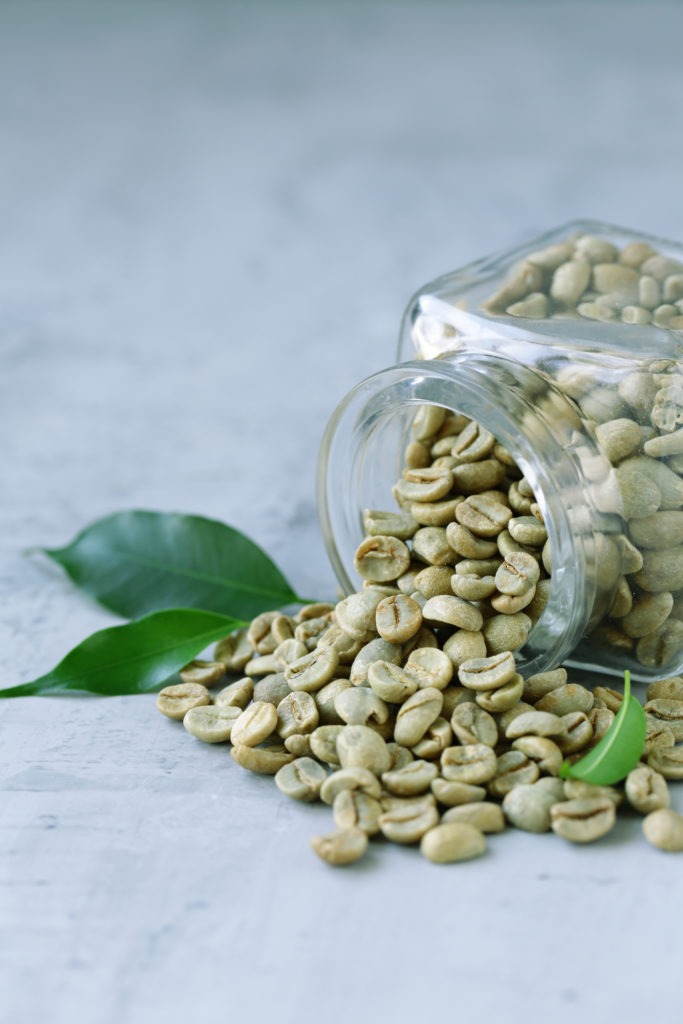
Coffee beans retain a lot of water when they are still green and unroasted. They couldn’t be ground up and brewed. You wouldn’t want to either because they taste strongly of grass. More enticing flavors and aromas arise as a result of several chemical reactions that are sparked by roasting.
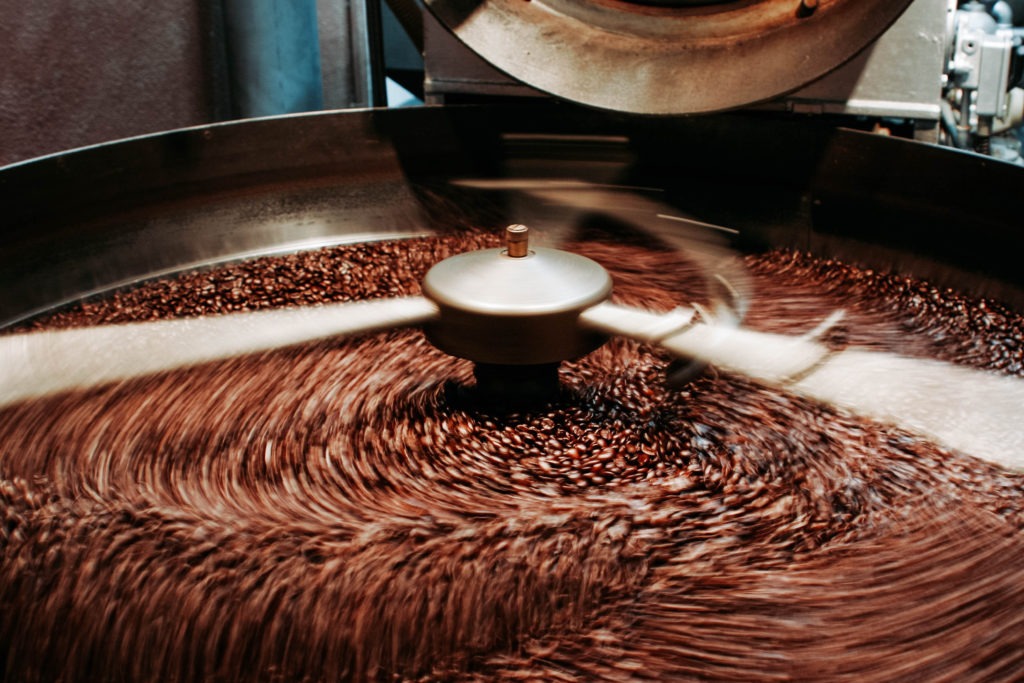
Some of the beans’ natural sugars are transformed into CO2 gas during roasting, while others are caramelized into flavors that contribute to the coffee’s varied tastes. After the process is finished, the green bean will change into a brown bean that is between 50 to 100% larger and around 18% lighter. In a week or two, the roasted coffee will start to lose some of its flavor and aromas due to degassing and other factors.
Stages of Roasting Coffee
Understanding the progression and the various steps of coffee roasting is the first step in learning how to roast coffee. Turning green coffee beans brown is a rather straightforward process. However, precise application of heat and attentive observation are necessary for mastering the talent. You may obtain various roast levels by paying attention to the minute variances in size, aroma, and color.
A disclaimer before we continue: There are just as many theories and explanations of coffee roasting as there are coffee roasters. Simply put, there is no one right list of stages of coffee roasting, but there is one right idea of coffee roasting and that is included in a plethora of lists you can find.
1. Row Beans
The beans will become light in color and occasionally seem virtually white after a very brief time in the roaster. During this initial stage, the aroma is primarily grassy and strongly reminiscent of uncooked green beans. Although the beans are absorbing heat and energy, it will still be some time before significant changes in appearance or aroma take place.
2. Yellowing
The beans will start to turn yellow as the roast develops. Now hay is the predominant odor. Actually, a complete host of chemical processes are necessary to produce the distinctive flavors and dark brown color of roasted coffee.
3. Caramelization
When the beans reach 145 to 160 degrees C, the most significant chemical reactions—the Maillard process, caramelization, and Strecker degradation—occur as the beans begin to darken, or at the browning stage. Many of the flavor and aroma components, including those that give coffee its sweetness and fruity acidity, are produced by these. This non-enzymatic browning is created when amino acids and reducing sugars interact (enzymatic browning occurs, for example, in apples as the inside are exposed to the air).
4. First Crack
The coffee will audibly pop or crack like popcorn and slightly expand (although much less than popcorn). We now enter the period of time when we typically drink coffee. The ease with which the coffee can now be ground and brewed depends on your level of development.
The first crack can be loud and quick or slow and prolonged, depending on the roast and the coffee. It is up to you when the roast comes to an end. Longer and darker roasts typically have less acidity and more body, whereas shorter development periods typically have a lighter profile.
5. Development Time
The development time is occasionally referred to as the period that follows the first crack. Things develop swiftly! At this stage, the coffee changes in both appearance and flavor the quickest. A cup of coffee might literally taste different after 30 seconds.
To extract the best flavor from the beans, you must keep an eye on how long and at what temperature the coffees are being roasted. How much time to devote to a roast depends very much on the individual. Everyone has a different preferred type of coffee, and it is usually after the first crack where most people make their adjustments as to how the coffee should taste.
6. Second Crack
Coffee will pass through a second crack if the roasting process lasts long enough. A slightly softer sounding crack as compared to that of the first crack will be heard. During this second crack, the oils will usually start to migrate from the inside of the bean to the outside.
The second crack is typically a reliable indicator of when the roast flavors can dominate the origin flavors. However, you might prefer to maintain a nice balance of the roast flavor and the origin flavor to allow the terroir to come through. But you can always follow your senses and let any flavor dominate the other – there really is no one correct way to do it.
7. Cooling
After roasting, coffee will be immediately cooled to a temperature similar to room temperature. It’s important to complete this process fast because if the coffee is left to warm for too long, the flavor will be compromised.
Things You Need to Roast Your Own Coffee
You will be needing a few things in order to properly roast coffee beans at the comfort of your own home. These are a few important things that you will be needing:
-
Green Coffee Beans
The hardest aspect of your roasting process will probably be finding green coffee. However, it is based on your location. You may inquire with your neighborhood coffee shops or look into any nearby roasters that offer unroasted coffee beans. Online purchases are also an option.
-
Coffee Roaster
Of course, in order to roast your own coffee, you need a roaster. There are many different kinds of roasters available in the market. Or you can also opt to use a simple skillet or a stovetop popcorn maker. But, ultimately, the type of coffee roaster that you will be needing will mainly depend on the method of roasting you choose (we’ll talk more about this below).
-
Storage
After you roast your coffee, you need to store them in a container. An opaque airtight canister is the most common container recommended by all who have anything to do with coffee. With an airtight container, you will be able to retain the coffee’s flavor and aroma for longer. But keep in mind that after roughly a week or two, even the best container won’t prevent the coffee from losing its flavor and aroma.
Different Methods of Roasting Coffee
There are various methods for roasting coffee at home, each having its own advantages and disadvantages. When deciding between them, think about your budget, how much coffee you’ll roast, and how much control you want over the roasting process.
-
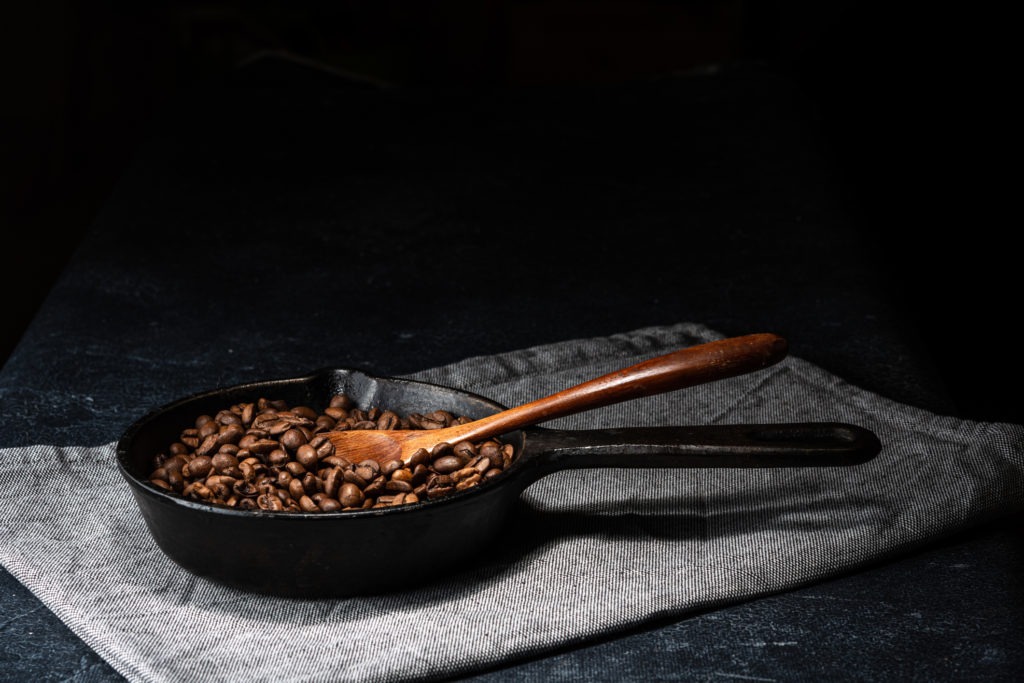
First Method: Pan Roasting
You’re used to using a pan to cook food, so this method will feel natural to you. To get it just right, though, might be tricky. The first few times you go through the process, you might not get a consistent roast. But don’t worry; we are here to help. Depending on how thoroughly you want your beans roasted, the roasting process will last 5 to 10 minutes.
1. Preheat your pan on medium to high heat.
Allow the pan to heat up to roughly 500 degrees. It might be necessary to adjust the heat during roasting, but don’t go much higher than 500 degrees.
2. Add your green coffee beans to the pan.
Green coffee beans should be added to the pan in a half-cup measurement. If you desire more, you can add more, but it’s best to start out little. You need to be able to stir them around easily for an even roast.
3. Stir your coffee beans regularly.
As the beans roast, begin stirring and continue doing so. This facilitates equal distribution of heat.
4. Observe color changes and listen for cracks.
Allow the beans to begin to crack and transition from green to yellow to light brown. Stop roasting if you want a light roast. If you like a medium roast, take the beans off the heat when they turn golden brown but before they crack a second time. Allowing them to crack a second time before taking them off the heat will result in a dark roast.
5. Transfer to a colander or bowl.
Transfer the coffee beans into the metal colander or bowl after the pan has been taken off the heat. To maintain their cooling, stir them around. The beans are still at or near 450 degrees, so exercise caution.
6. Let the beans de-gas.
Let the beans de-gas in a container with the lid off for about eight to twenty-four hours. Although you might be tempted to brew your aromatic beans right away, you should wait for the best flavor. About 24 hours after roasting, your coffee will be at its most flavorful.
7. Store in an airtight container.
Your beans should be ground just before brewing, and the rest should be kept in an opaque, airtight container.
-
Second Method: Oven Roasting
Another quick option is to roast your beans in the oven, but you’ll need to stir and monitor them often. This method’s advantage is that it produces evenly roasted beans in about 5 to 10 minutes.
Similar to the stove method, the steps are basically the same. Half a cup of green coffee beans should be equally distributed on a baking sheet as your oven is preheated to 500 degrees Fahrenheit. Every one to two minutes, stir while keeping an eye out for color changes and paying close attention for the first and second cracks. Follow steps five through seven above after taking the beans out of the oven.
-
Third Method: Popcorn Popper Roasting
The third method for roasting coffee beans is with the use of an old-fashioned popcorn popper. The time required by this technique is also between five and ten minutes. Make sure you purchase the correct type of popper. Effective poppers have built-in stirring motors that will make consistently roasting much easier.
Place your popcorn popper on a burner over medium heat, then add half a cup of green coffee to it. Stir continually while paying close attention for the first and second cracks using the stirring mechanism. Follow steps five through seven above after removing from heat.
Step-by-step Guide to Home Roasting Coffee
1. Purchase Green Beans
In addition, you’re not going to immediately know which coffee you prefer. This is especially true if you typically sip the house blend. Use small lots as an experiment until you are more confident about your choices. Since sample packs typically contain a variety of regions, they make a wonderful place to start. It would be best to research and know as much as you can about a coffee that you intend to buy. This is due to the fact that even coffees from the same origin might differ significantly from one another, especially if the country is large or the variety and processing method are different.
But once you have your green beans, store them at room temperature and out of direct sunlight in a cool, dry place. This will prolong their freshness and quality.
2. Select Your Roast Method
As we’ve presented above, you have to choose which home roasting method you’re going to utilize.
3. Prepare Your Roast Device
After selecting your method of home roasting, you can now determine which device you need to prepare for your roasting.
4. Set Up Your Roasting Area
As we have mentioned at the outset of this guide, not only is proper ventilation essential for the quality of your roast, but also for your safety. To allow the smoke produced by the roasting of the beans to escape, use an extractor fan, open your windows, and think about roasting outside or in an open garage.
Additionally, you’ll need a few pieces of equipment nearby. Scales are a smart purchase to ensure that you are aware of the precise amount of coffee you are roasting per batch. A thermometer is useful for popcorn machine users as well. The best equipment to have when working with hot materials is a set of silicon gloves, a tiny fan for cooling, and a sieve for cooling your beans.
5. Roast Your Coffee
If you opt to purchase a home roaster, the handbook for your home roaster will walk you through the various profiles. It can be a good idea to start using presets until you become more accustomed to the procedure. However, if you choose to roast your beans with the use of a pan, oven, or popcorn popper, the procedure for these methods of roasting are laid out above when we discussed the different methods of roasting coffee. Always keep in mind though that for an even roast, the beans must be constantly moved or stirred.
6. Cool and Store
Remove the beans from the heat and allow them to cool once they have achieved your preferred roasting development. Make sure to move quickly since they will continue to roast until they are totally cooled. Additionally, you should eliminate any chaff, which is the dried coffee bean husk.
The roasted beans can be stored once they’ve cooled to room temperature. The roasted beans can be stored once they’ve cooled to room temperature. Additionally, for best results, don’t brew your coffee immediately after roasting, let it de-gas for about eight to twenty-four hours.
Common Home Roasting Mistakes
Although roasting coffee at home is quite simple, there are a few simple errors that might ruin your beans.
-
Roast Time
Don’t become too attached to your roast time; you might need to adjust it occasionally. For instance, roasting outdoors may require more time for your machine to warm up. Underdeveloped, under roasted beans could result if you don’t make the necessary adjustments.
-
Batch Size
The roasting time and optimal temperature can both be affected by the batch size. It’s possible that you’re using such a big batch that the beans won’t roast evenly. Or you might be roasting so quickly that some of the beans don’t get to the right level of browning.
To achieve a long enough development time to even out your roast, try balancing the size of your batch and the amount of heat you apply. Try lowering your batch size if your roasting period is really long but the coffee is still uneven.
-
Temperature Setting
Beans can become scorched if the highest temperature setting is used to try to speed up the roasting process. Also keep in mind that a thermometer only measures the temperature of the air within the roaster, not the temperature of the beans themselves. Pay attention to more than just your readings; take note of the coffee’s color and aroma, as well as the first and second cracks.
-
Cleanliness of Roaster
Chaff and oils can accumulate, creating problems for subsequent roasts and sometimes even a fire. Your coffee will continue to taste fantastic if you keep everything clean.
-
Focus
If you are tempted to multitask or become distracted during roasting, mistakes are very likely to occur. Don’t leave your roaster unattended. Even if you’re tuned into your machine, if you glance away to do something else during a roast, you’re still playing with fire. A roast can alter very rapidly. Keep an eye on your roast at all times.
Conclusion
Home coffee bean roasting is a very special skill that, in the opinion of many who do it, may easily turn into an addiction. After roasting their own beans, many people find that they cannot go back to store-bought beans since freshly roasted beans are so flavorful and aromatic.
Although it might appear difficult at first, roasting coffee isn’t particularly difficult. We have provided you with detailed instructions and three distinct methods for roasting coffee yourself at home. See for yourself why so many coffee lovers have started roasting their own coffee at home by trying one of our techniques.


